
How to make your own DIY wall clock
Summary
- 1. Why choose a wall clock?
- 2. Step-by-step guide to making your own DIY wall clock
- 3. How to personalize your wall clock?
- 4. Essential care and maintenance for your clock
1. Why choose a wall clock?
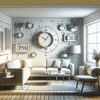
Wall clocks are not just simple time-telling devices; they are also key pieces of interior design. They bring both aesthetics and functionality to a room, transforming a plain wall into an attractive focal point. A well-chosen wall clock adds a personal touch to a space while remaining a practical tool.
- First key point: Wall clocks have been symbols of style and class for centuries.
- Second key point: There is a variety of wall clocks that suit every style of interior decoration.
- Third key point: Investing in a wall clock is an elegant way to personalize your space.
In summary, this section helps you better understand the importance of wall clocks and make the best decisions for your decor.
1.1 What is the history of wall clocks?
Wall clocks have a long history dating back several centuries. They have evolved from timekeeping tools to the decorative objects they are today.
- 1: Initially, wall clocks were large pendulum pieces used in institutions.
- 2: In the 17th century, they became popular in European bourgeois homes, symbolizing status and refinement.
- 3: Today, innovation in materials and design has transformed these objects into countless decorative elements.
This subsection highlights the essential elements for understanding the evolution and historical importance of wall clocks.
1.2 Types of wall clocks and their criteria
Choosing a wall clock requires an understanding of the different styles available and their distinctive features.
- 1: Analog, digital, pendulum and modern clocks come in many styles to suit every interior.
- 2: The selection criteria include size, mechanism, material, and power supply.
- 3: A minimalist style might favour glass and metal, while a rustic interior would opt for wood.
This subsection offers an overview of the various types of wall clocks and the criteria for making the best choice according to your tastes.
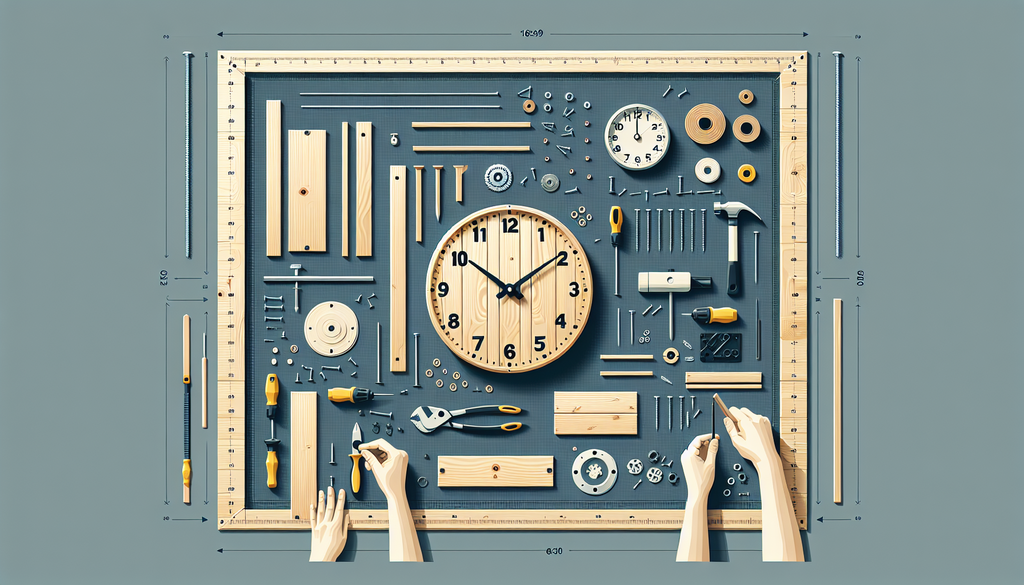
2. Step-by-step guide to making your own DIY wall clock
A DIY wall clock is a beautiful way to add a personal and unique touch to your home. The creation process may seem daunting, but with the right guidance, it becomes an enjoyable and rewarding activity.
- First key point: Designing a wall clock requires specific materials and some basic tools.
- Second key point: Step-by-step manufacturing facilitates understanding and execution.
- Third key point: Avoiding certain common mistakes guarantees a quality creation.
In summary, with these instructions, making your own DIY wall clock becomes a pleasant and creative project.
2.1 What materials and tools do you need?
The success of your DIY wall clock project depends largely on the tools and materials you choose. Here's a list to get you started:
- 1: A clock mechanism, hands and numbers or markers for dial.
- 2: Materials for the dial: wood, metal, glass or even cardboard for a custom design.
- 3: Tools needed: drill, metal glue, paintbrushes and varnish.
Having all the materials and tools in advance ensures that you can complete your wall clock project without interruptions.
2.2 Key steps in creating a wall clock
Let's now move on to creating your DIY wall clock . This process may seem technical, but with these key steps, you'll create your own masterpiece.
- 1: Cut the chosen material for the clock face to the desired size.
- 2: Attach the clock mechanism to the back of the dial using a drill and follow the manufacturer's instructions.
- 3: Paint or decorate the dial according to the desired style, then let it dry before placing the hands.
With these steps, you will create a DIY wall clock that reflects you and beautifies your space.
2.3 Tips to avoid common mistakes
Creating a DIY wall clock can involve some avoidable pitfalls with a few key tips. Careful attention to detail makes all the difference.
- 1: Ensure the clock mechanism is properly centered for smooth hand movement.
- 2: Double-check the dimensions before cutting the material to avoid costly mistakes.
- 3: Test the mechanism and power supply before permanently assembling the parts.
These practical tips will ensure that your DIY wall clock works perfectly and for a long time.
3. How to personalize your wall clock?
Giving your wall clock a unique touch is the perfect opportunity to express your creativity. With a few simple techniques, you can transform a plain clock into a true work of art.
- First key point: Explore different design ideas to satisfy all your desires.
- Second key point: Discover personalization techniques that will enhance your creation.
- Third key point: Experiment to discover new ways to integrate your clock into your interior decor.
In summary, this section offers you inspiring ideas to make your wall clock truly stand out.
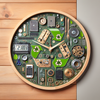
3.1 Design ideas for every taste
Unleash your creativity with personalized wall clocks that suit every personality and interior. Here are a few ideas to get you started.
- 1: Use personal photos on the dial for a warm, family-friendly look.
- 2: Incorporate natural elements such as pieces of wood or dried leaves for rustic charm.
- 3: Opt for fluorescent paints for a dynamic and modern atmosphere.
These design ideas show that the customization of your wall clock is potentially endless.
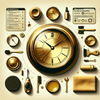
3.2 Innovative personalization techniques
Using the latest techniques to personalize your wall clock ensures a unique and modern look. Here's how:
- 1: 3D printing makes it possible to create dials or hands with unique shapes.
- 2: Hydrographic painting techniques offer varied and complex patterns.
- 3: The use of LEDs integrated into the design for a luminous and interactive clock.
With these innovative techniques, your wall clock will become the focal point of your interior décor.
4. Essential care and maintenance for your clock
To ensure the longevity of your DIY wall clock , regular maintenance is essential. This will ensure that your masterpiece remains functional and aesthetically pleasing for years to come.
- First key point: Follow a few simple recommendations for routine maintenance.
- Second key point: Anticipate and resolve common breakdowns efficiently.
- Third key point: Invest in quality for a clock that lasts.
In summary, understanding the principles of maintenance will enhance the usefulness and beauty of your wall clock .
4.1 What are the tips for regular maintenance?
Maintaining your DIY wall clock only requires a few simple but regular steps to avoid any deterioration.
- 1: Gently clean the dial with a dry cloth to avoid scratches.
- 2: Check the batteries regularly and replace them as soon as they get weak.
- 3: Inspect the needle adjustment to ensure they are not jammed.
These maintenance tips ensure the proper functioning of your wall clock and extend its lifespan.
4.2 Solutions for common breakdowns
Despite your best efforts to maintain it, your wall clock might still experience problems. Here's how to address common issues:
- 1: If the clock stops, make sure the mechanism is properly powered and not blocked.
- 2: In case of irregular movement of the hands, check their alignment and the mechanism to detect a defect.
- 3: For a noisy ticking sound, check the insulation of the mechanism and make sure it is securely fixed.
With these solutions, most of your wall clock problems can be easily solved at home.
Frequently Asked Questions
-
Q: How much does it generally cost to make a DIY wall clock?
- A: The cost can vary between 20 and 60 euros depending on the materials and mechanism chosen.
-
Q: Where can I buy the clock mechanism?
- A: You can find a wide range of clock mechanisms on our online store Temps des Horloges , specializing in wall clocks and DIY.
-
Q: What is the average lifespan of a DIY clock mechanism?
- A: In general, with good maintenance, a mechanism can last between 3 and 5 years.
Additional information
Creating your own DIY wall clock can be an exciting and rewarding adventure. For those looking to add a touch of brightness to their interior, is a fluorescent wall clock a useful decorative element? Discover how these models can transform your space.
Maintenance checklist
- 1: Deactivate the mechanism of your wall clock before starting the cleaning.
- 2: Use a soft, dry cloth to gently dust the surface of the clock.
- 3: Depending on the material of your wall clock, apply a specific product: a wood cleaner, a damp cloth for metal, or a glass cleaner.
- 4: Regularly check the fasteners and make sure they are properly tightened.
- 5: Replace the batteries at least once a year to ensure your wall clock functions properly.
Pro tip
To prolong the life of your wall clock , consider using a thin coat of protective varnish on the wooden or metal parts. This prevents moisture and dust from damaging the clock's appearance and structure.
Useful external resource
For those who are curious or passionate, we recommend this additional article.
Conclusion
Through this article, you have discovered the keys to making a DIY wall clock , from choosing materials to personalization.
This is an opportunity to unleash your creativity while adding a centerpiece to your interior decor.
🎨 Ready to transform your space? Explore our collections and tips to enrich your DIY project.

